Command-Line Interface
These are technical notes I compiled while studying using Trailhead, Salesforce's free self-learning portal.
Learn About The Command-Line Interface
Explain what the command-line interface is. Identify the different shells for each operating system (OS).- Introduction
- Developers commonly work in the command-line tool when coding projects such as Lightning Web Components
- Command-Line Interface (CLI)
- Graphic User Interfaces (GUIs) are interfaces that consist of screens, buttons, and menu(s), and make it easy to do basic tasks like navigation and database updates
- Command Line Interface (CLI) is a text-based interface where you write commands in the tool
- Command-Line Uses
- CLI lets you do complex actions quickly, and is customizable with plug-ins and packages, which lets you customize your development workspace tools
- CLI enables developers to execute scripts, create directories, and interact with tools like Git where you can build and work on source-driven development projects or CI integrations
- Where Is the Command-Line Tool?
- The OS you work on determines where the command-line tool is located:
- macOS/Linux: primary command-line tool for macOS and Linux is Terminal
- Open finder, type
Terminalin the search field
- Open finder, type
- Windows: primary command-line tool is Command Prompt
- Click Start, type
Commandorcmdin the search field
- Click Start, type
- macOS/Linux: primary command-line tool for macOS and Linux is Terminal
- Code editors like Visual Studio Code (VS Code) have built-in terminal windows
- Salesforce recommends using VS Code terminal window to run commands and work with the Salesforce CLI
- Salesforce Extensions in VS Code includes empowering shortcuts and tools for Salesforce development
- The OS you work on determines where the command-line tool is located:
- What is a Shell?
- Behind the command-line window is a command-line interpreter, or shell, that processes the commands you run
- This page focuses on the default shells for macOS and Windows
- Different Types of Shells
- Windows: most common shell is PowerShell
- macOS: most common shell is Zsh or z shell. Z shell is a unix shell that extends Bourne shell functionality (AKA BASH shell) with improvements
- BASH stands for “bourne-again shell,” and follows the language and syntax called the Shell Command Language as defined by POSIX
- BASH and Zsh are the most commonly used shells in developer tutorials
- Know how PowerShell and ZSH Differ
- Features and outputs of PowerShell and Zsh vary:
- Zsh treats outputs as strings such as writing to .txt files
- PowerShell treats the output as objects
- String outputs generally make it easier for the user to transfer info across programs
- Features and outputs of PowerShell and Zsh vary:
Explore Command Structure and Navigation
Name the three main parts of a command structure. Identify the command used to change directories through the command line.- General Commands
- General commands help you learn fundamental skills such as navigating in the command line and creating directories
- Command Structure
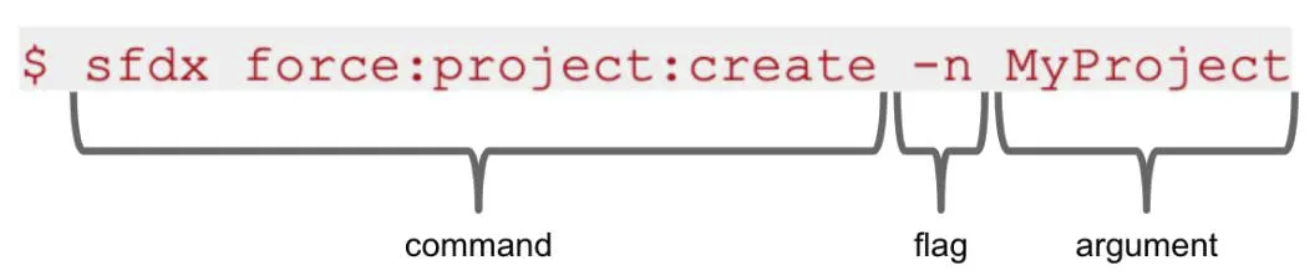
- All commands have three parts:
$ command -flag arguments $ sfdx force:project:create -n MyProject- Command:
sfdx force:project:create,- AKA “utility,” tells the system what actions you want the tool to take
- Flag:
-n- AKA “options,” tells the command what other variables to include or describe what you want to name your project
- Flags generally start with a
- - Switches are like flags but don’t require arguments, identified by two hyphens,
--and followed by a value - Ex:
--setdefaultcauses the system to remember your username and authentication
- Argument:
MyProject- Tell the system what variable you want to set or which process you want to invoke
- Usually follow a flag after a space
- Ex:
-n MyProject - No spaces in an argument
- Command:
- All commands have three parts:
- Flags, Switches, and Arguments
- Consider example of
sfdx force:org:create -f project-scratch-def.json -s- Command:
sfdx force:org:createtells the system we want to create a scratch org - Flags
-fis a required flag, tells the system to reference the filename that outlines what template to reference to create the scratch org-ssets the newly created scratch org as the default. Does not require an argument because you can write the flag as a switch--setdefaultusername.
- Arguments: the file’s name being referenced,
project-scratch-def.json. It determines what features and special org set up is needed for the new scratch org.
- Command:
- Consider example of
- How to Run Commands
- To run a command, you type it into the command-line window and press enter
- In macOS/Linux, a
$on the next line indicates success, or in Windows, a>on the next line indicates success - Keep in mind capitalization matters:
myProjectis not the same asMyProject
- Navigation Commands
- To see the current location in your directory, refer to the command-line path
- macOS:
yourname-ltm:~ yourname$ - Windows:
PS C:\Users\yourname>
- macOS:
cd Documents: change to the Documents directorymkdir Resume: create a new directory named “Resume”- Navigate through multiple directories:
- macOS:
cd ~/Documents/Resume - Windows:
cd ~\Documents\Resume
- macOS:
cd ..: navigate one level back- Print the working directory
- macOS:
pwd - Windows:
cd
- macOS:
- To see the current location in your directory, refer to the command-line path
- View Your Command-Line History
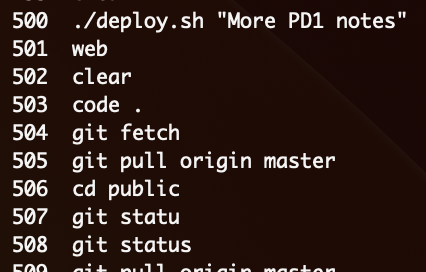
history: To see a history log of commands run so far!503: re run the command executed on line 503
Learn About The Command-Line Tools
Identify the command-line tool that helps install packages using the command-line interface. Identify the software tool that is the successor to the Force.com IDE plug-in for Salesforce development.- Developer Command-Line Tools
- Command-line tools, like npm and Salesforce CLI, give developers a boost in their projects by integrating with other developer tools
- This section describes installation of:
- Visual Studio Code (VS Code)
- Node.js command line tool
- npm
- Salesforce CLI
- Install Visual Studio Code
- Visual Studio Code is Salesforce’s preferred code editor because its customizable and cross-platform
- Visual Studio Salesforce Extension
- Provides code completion, syntax highlighting, Apex debugging, etc
- To install, in VS Code, select View, then Extensions, then search
salesforce extension pack, then “Install”
- Find Your Shell
- In VS Code, click Terminal > New Terminal
- For MacOS/Linux, you see Bash or Zsh
- For Windows, you see PowerShell
- In VS Code, click Terminal > New Terminal


- Set Up Node.js and npm
- If developing Lightning Web Components, or working in a JavaScript runtime environment such as Node.js, you’ll use npm to install and update packages
- npm tool through the command-line interface helps install packages quickly and keeps them updated
- First, install Node.js
- Confirm installation by checking version with
node -v - To see if you have npm installed, run
npm -v - If you need to update npm version, run
npm install npm@latest -g
- Install and Update Salesforce CLI
- Install Salesforce CLI from https://developer.salesforce.com/tools/sfdxcli
- In VS Code, click Terminal > New Terminal
- Command-line tool that helps install packages using the command-line interface: npm
- Software tool recommended to develop with for the Lightning Platform? Salesforce Extensions for VS Code