Org Development Model
Plan for Changes to Your Org
Describe how you manage change using the org development model. Identify the tools that you need for org development. Explain the benefits of using a source control system.- Org Development Model is ideal for teams that need a change process that supports multiple contributors developing on the Lightning Platform at the same time.
- It is ideal for teams that struggle with:
- Tracking everyone’s changes
- Keeping development and testing environments in sync
- Creating and deploying change sets multiple times due to errors and differences between environments
- It is ideal for teams that struggle with:
- Org Development model uses a source control repository to store changes and project files, which helps mitigate the pain point of keeping environments in sync.
- Externalizing the changes for each release helps the team know the source repo reflects what they are delivering and it isn’t affected by environment differences.
- Release artifact is a set of metadata changes to apply to the production org, like with change sets.
- Use of the Salesforce Extensions for VS Code to retrieve metadata from their development environment. Then, store the changes in the source control system.
- Stages of the development process:
- Develop and Test: Each team member uses their own Developer sandbox
- Build Release: Each team member migrates their customizations to a Developer Pro sandbox for integration. These can be seeded with test data.
- Test Release: Team uses a partial sandbox for user-acceptance testing.
- Release: After release is in production, team can use the full sandbox to train users without risking altering production data.

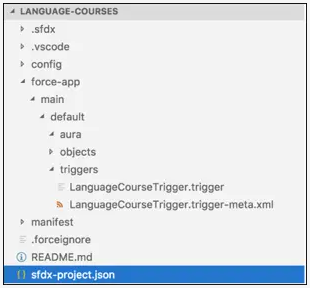
Salesforce DX Project
- The Salesforce DX Project contains the source and files that comprise your changes. A DX Project has a specific project structure and source format.
- Project contains
source filesand a configuration file,sfdx-project.json - The DX project is like the outbound change set, where you’re managing and collecting the changes that will be sent to production
- Project contains
Deployment Artifact
- After testing changes, a Deployment Artifact (.zip file) is created.
- Usually deployed to the Full Sandbox and then finally to Production
- All changes are stored in a Source Control System, which contains the Salesforce DX Project
Salesfirce CLI
- Salesforce CLI is a command-line interface that can be used for org development. It can:
- Authorize sandboxes (headless or web flow)
- Create and manage DX projects
- Import and export test data
- Retrieve and deploy metadata
- Run and automate tests
Salesforce Extensions for Visual Studio (VS) Code
- Salesforce Extensions for VS Code is built on top of Salesforce CLI and VS Code
- Forms an integrated development environment that’s created for custom development on Lightning Platform.
- Salesforce CLI commands can be run directly from the command terminal
- Best to install the Salesforce Extension Pack, which includes these VS Code extensions:
- Salesforce CLI Integration—interacts with Salesforce CLI to provide core functionality.
- Apex—uses the Apex Language Server to provide features such as syntax highlighting and code completion.
- Apex Replay Debugger—enables VS Code to replay Apex execution from Apex debug logs.
- Aura Components—supports Aura component bundles.
- Visualforce—supports Visualforce pages and components.
Change Management Mechanism
- Change list: spreadsheet for each developer with changes each has made in their own dev org
- Deployment run list: any manual changes required in the org pre-and post-deployment
- Includes metadata that can’t be deployed like profile and permission set assignments
- Project management tools: like Agile Acceslerator and Jira to embrace Agile development practices.
Install Tools
- Install Salesforce CLI. Instructions below for Linux.
wget https://developer.salesforce.com/media/salesforce-cli/sfdx-cli/channels/stable/sfdx-cli-linux-x64.tar.xzmkdir sfdxtar xJf sfdx-cli-linux-x64.tar.xz -C sfdx --strip-components 1./sfdx/install- Verify Salesforce CLI installation and plug in verions:
./sfdx/install,sfdx plugins --core,sfdx commands - Install VS Code and Salesforce Extensions for Visual Studio Code.
- Link, install 64-bit .deb version
- Open VS Code, CTRL-P,
ext install salesforce.salesforcedx-vscode
- Install Git.
- Set up Git.
- Create a GitHub account.
- The org development model:
- Externalizes changes in a source control repository to keep environments in sync
- What is one benefit of using a source control system with the org development model?
- It allows developers to work on the same set of files at the same time.
Develop and Test Changes Locally
Create a branch and commit changes to a source control repository. Authorize a sandbox using Salesforce Extensions for VS Code. Retrieve changes from a sandbox.- This section demonstrates the org development model workflow.
- Create the Source Control Repository
- Ex: Use a private GitHub repo
- Create a Salesforce DX Project
- From command palette (CTRL-Shift-P), search
sfdx project, then selectSFDX: Create Project. Choose Empty to create an Empty Project Template. Name the project sames as the GitHub repo. - Add a
.gitignorefile, adding.sfdxand.vscodeto the file so that these files will be ignored by git.
- Add project files to the GitHub Repo
- On the Quick Setup part of the new repo screen, choose upload an existing file.
- From the file browser, drag the directories and project files to the window in GitHub.
- Choose Commit changes
- Create a new Branch in the Repo
- Another developer could then navigate to a folder on their own machine and clone the repo into its own directory with
git clone https://github.com/github-username/link-to-project - Create another branch with
git branch some-new-branch - Switch to that branch with
git checkout some-new-branch
- Authorize and Log In to the Sandbox
- From command prompt (CTRL-Shift-P), enter
sfdx authorize, then select SFDX: Authorize an Org, then select Sandbox- For trailhead orgs, need to select Production
- Log in to the org via the browser you are redirected to
- Salesforce CLI will request access to the org.
- Make any changes and track them in a spreadsheet
| Metadata Entity | Object | Change Type (Create, Update, Delete) | Details |
|---|---|---|---|
| CustomObject | Language_Course_Instructor__c | Create | Object to capture the name of the person teaching the course |
| CustomField | Course_Instructor__c | Create | Master-detail relationship with Language_Course__c custom object |
- Retrieve the changes from the Sandbox (Beta)
- In the VS Code Terminal, run the following CLI command to retrieve the new custom object and custom field:
sfdx force:source:retrieve --metadata CustomObject:Language_Course_Instructor__c,CustomField:Language_Course__c.Language_Course_Instructor__c
- Commit the changes
-
From VS code, select the Source Control icon. Select the check mark to select all files. Commit the files.
-
From CS Code command prompt (CTRL-Shift-P), select Git Push To… and select the repo
-
A Trigger is a piece of Apex code that executes before or after records of a particular type are inserted, udpated, or deleted from the Lightning Platform database.
- Best practice when a new feature needs to be added by a different dev:
- Developer clones the repo locally,
- In VS Code:
Git: Create Branch- create a branch within the GitHub repo to separate work - In VS Code:
SFDX: Authorize an Org- add the credentials for the developer’s org - In VS Code:
- Expand the
force-app/main/default/objectsfolder, right-click it, and selectSFDX: Deploy Source to Org - Now, the new developer’s org is populated with the metadata from GitHub
- Expand the
- In VS Code: Add any new features. For example, to create a trigger, add a “triggers” directory within “force-app/main/default”, then right-click the new “triggers” folder and select “SFDX: Create APEX Trigger”.
trigger LanguageCourseTrigger on Language_Course__c (after insert, after update, after delete) { // <write your own notification code> }- Add a test trigger, etc.
- In VS Code: right-click the folder with the new features, then select “SFDX: Deploy Source to Org”
- Commit the changes to the repo, then create a pull request.
- Add the new changes to the change list:
| Metadata Entity | Object | Change Type (Create, Update, Delete) | Details |
|---|---|---|---|
| ApexTrigger | LanguageCourseTrigger | Create | Emails Sales team when Language_Course__c object is created, updated, or deleted |
| ApexClass | TestLanguageCourseTrigger | Create | Apex test coverage for the trigger |
- Developers should develop customizations in VS Code (like triggers), then deploy them to Developer sandboxes for validation and testing.
- They should use Setup for everything else, so they can take advantage of builders and wizards and declarative interfaces. And then they retrieve those changes from the sandbox to their local file systems. They commit their changes to source control, create a pull request, and request a code review before merging their changes to the master branch.
- Once a project is underway, what must a developer do before making changes?
- Deploy any changes from the repository into their Developer sandbox
- After a dev makes a change in a sandbox, what step is required to share it with others?
- Retrieve the changes from their sandbox to the project in the source repo.
Test and Deploy Changes
Convert your source to the proper format to deploy to production. Explain the commands used to deploy changes to your org. Describe how to speed up deployments with Quick Deploy.- Once all development is done, the next step is the build release phase to integrate all changes in a Developer Pro sandbox.
- At this stage, the source of truth (all changes for this release) now live in the GitHub repo
Create the Release Artifact
- Pull the changes from the repo
- Authorize the Developer Pro sandbox
- Build the Release Artifact
-
The Repo contains the components in DX source format, which is a granular and decomposed file format to facilitate team development. It must instead be metadata format, which is the format required for deploying to an org using
force:mdapi. -
Navigate to the Salesforce DX project folder
-
On the command line, run the
source:convertcommand:sfdx force:source:convert --rootdir force-app --outputdir tmp_convert -
Create the .zip file of the changes
-
force:mdapi:deployshould be used to perform integration testing and staging, and then deployment to production. If any component has errors, the command rolls back the entire deployment. This transactional process maintains the integrity of the staging and production environmentsforce:source:deployis meant for development use cases when you are interacting with a sandbox for development and local testing - it is not transactional and attepts to deploy all components.
- Once the release artifact is built, the next steps are:
- Test the Release Artifact in the Test (Partial) Sandbox
- Test the Release Artifact in the Staging (Full) Sandbox
- Release to Production
- Perform Post-Deployment Tasks Listed in Deployment Run List
- What is the release artifact?
- A .zip file that contains only the objects and components that are changing in the release.
- Why does the org development model use
force:mdapi:deployto deploy changes to staging and production?- To deploy all components in the artifact in a single transaction