Create Notification Actions in Flow
The notes below describe how to set up notifications using Salesforce Flows. Credit to Adam White's post on LinkedIn for help with some of these details.
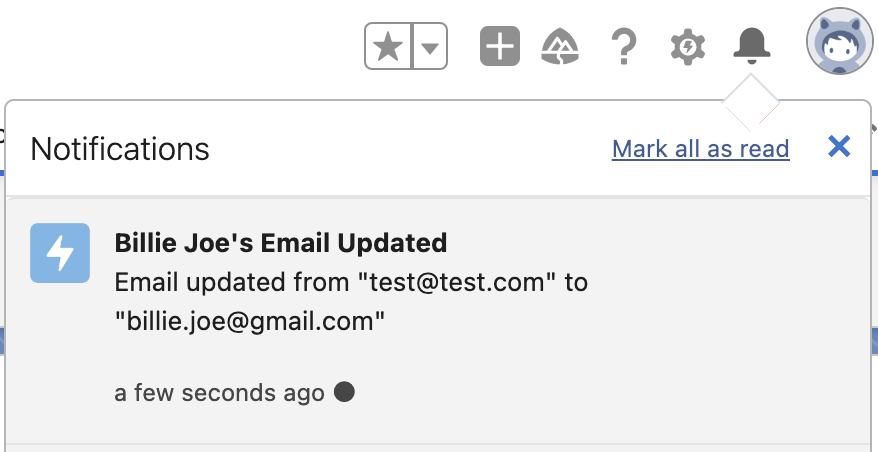
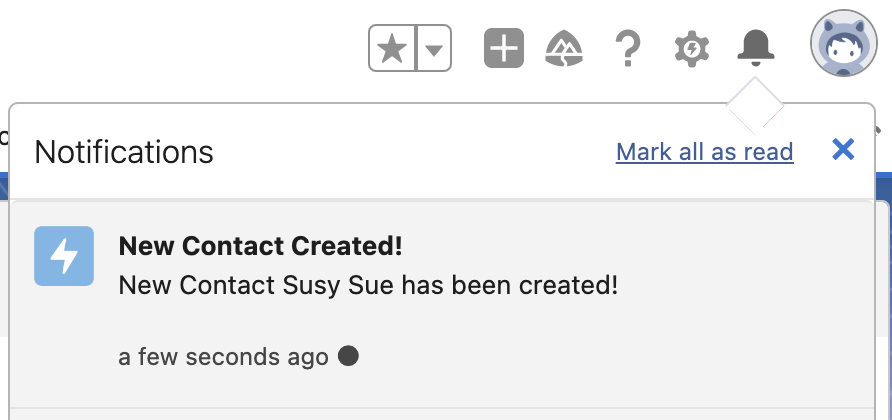
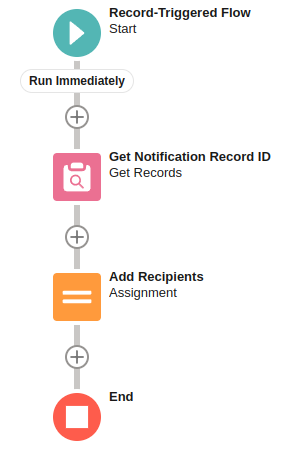
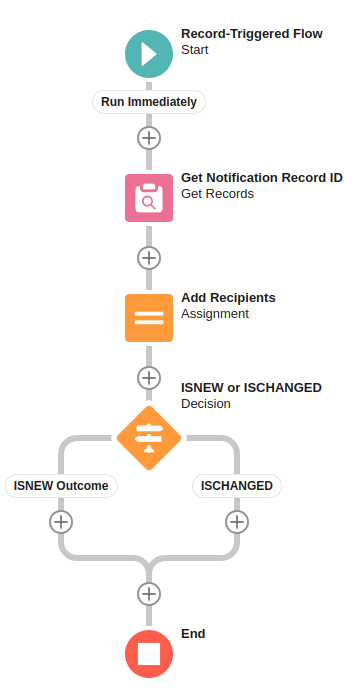
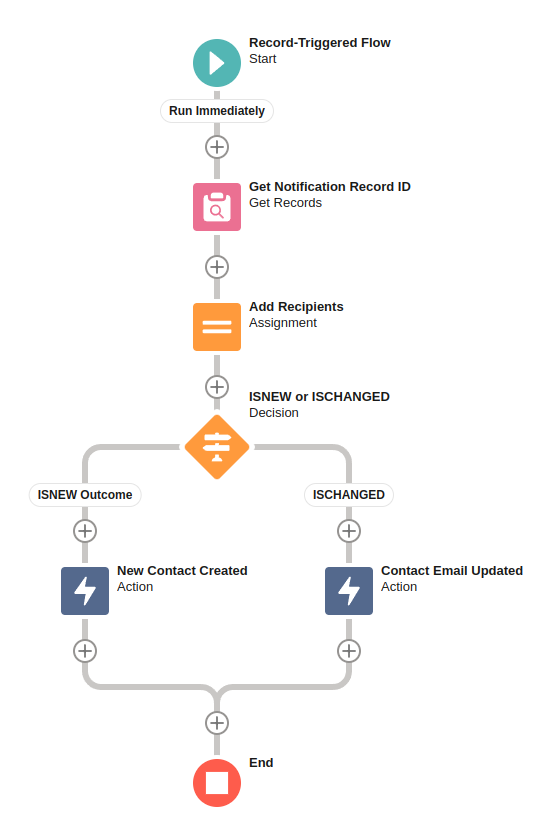
This process is less intuitive than you would hope. The following steps need to be completed in this order. Reference the screenshots that follow the instructions, below, that show a practical example where a notification is sent every time a contact is created or has an email updated.
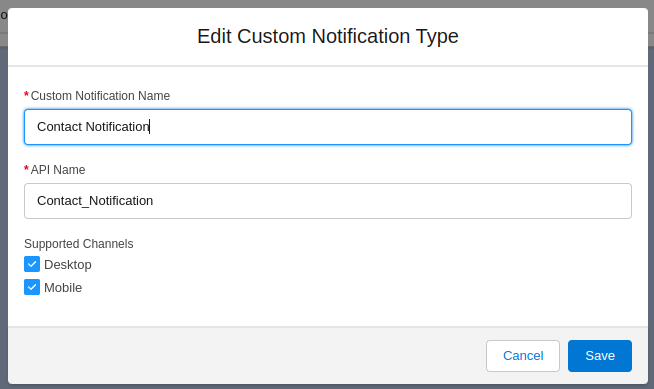
- Set up a custom notification via Setup > Quick Find > “notification” > Custom Notifications. Note the
API Name, in the example below it isContact_Notification. - Set up a new record-triggered flow using the Flow Builder in setup.
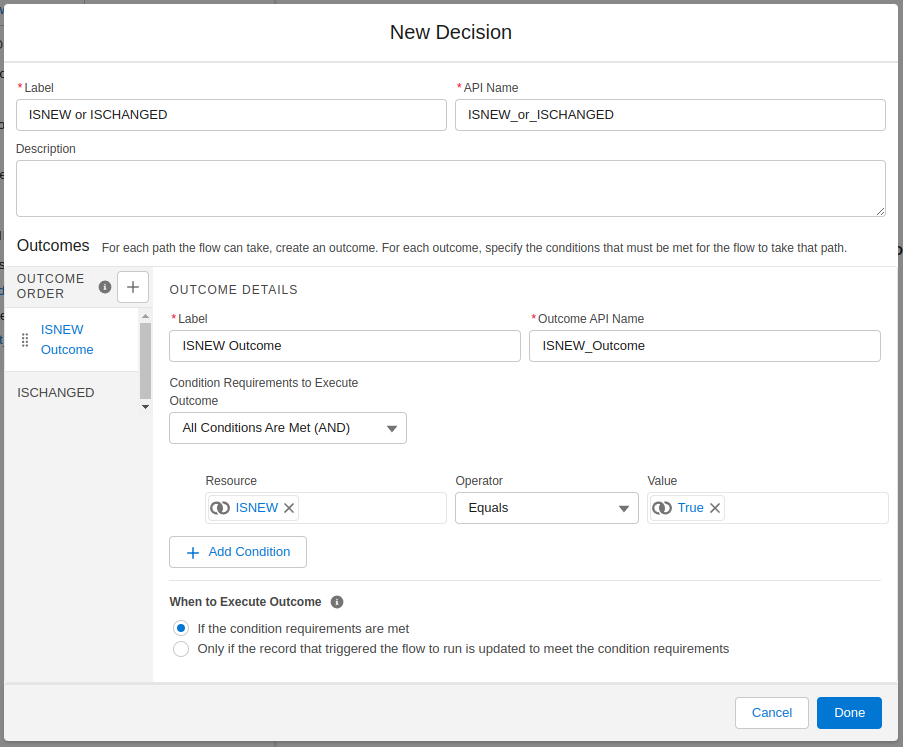
- In the new Flow, set up entry conditions such that the flow fires in all the situations where a notification should be issued. In the example below it is when
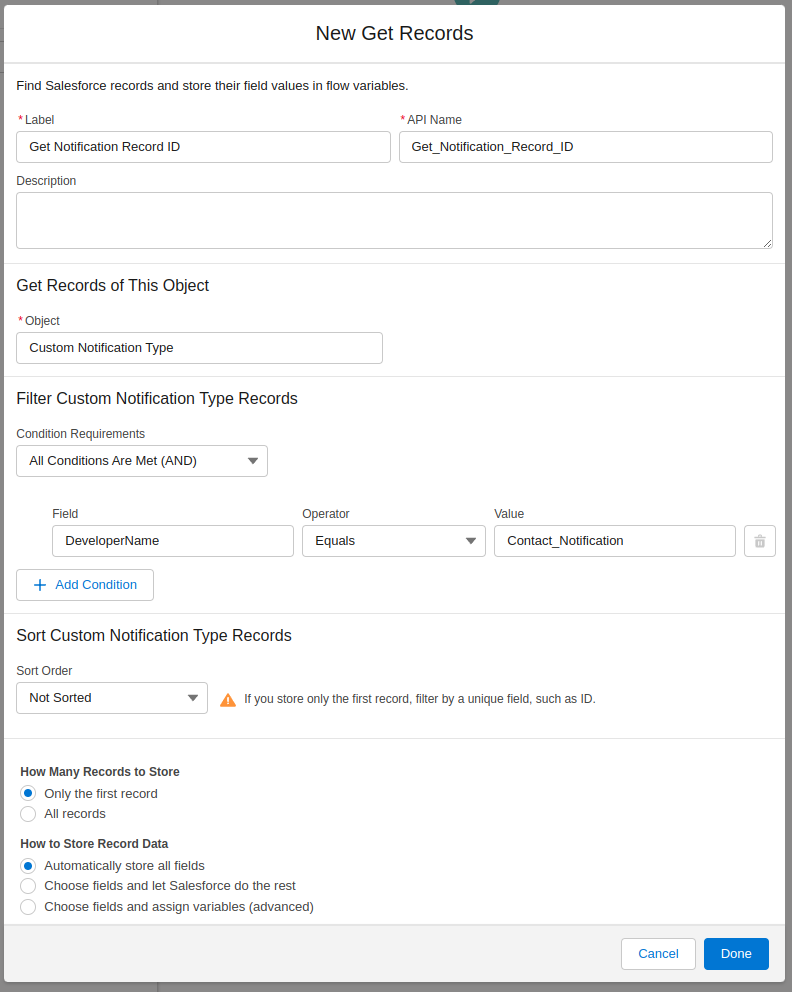
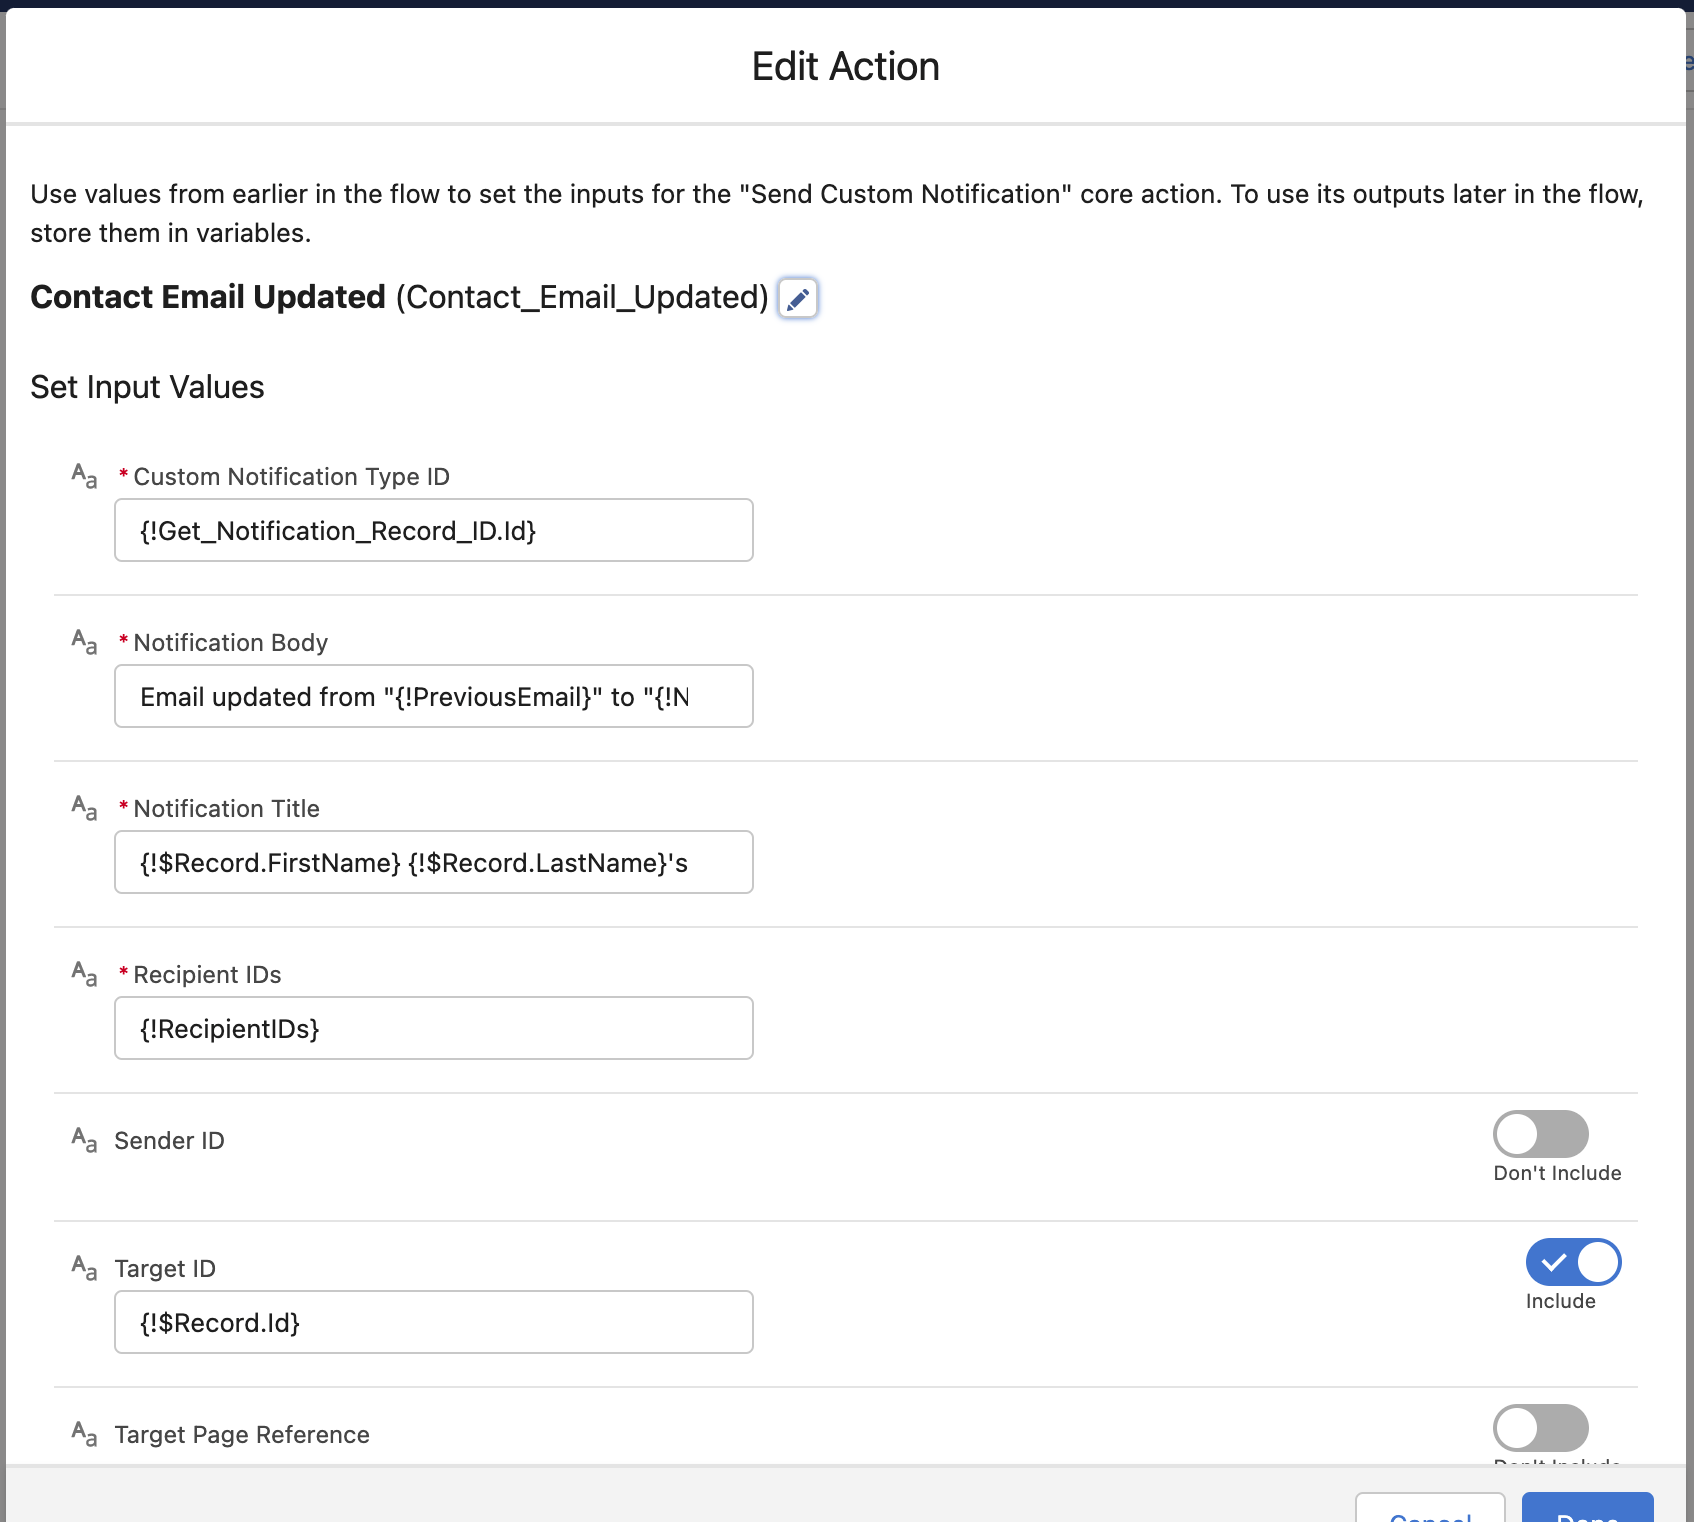
Contactsare newly created,ISNEW(), or when the email is changed,ISCHANGED({!Record.Email}). - The Custom Notification Type ID in later steps requires the record ID for the custom notification set up in step 1. Avoid hard-coding the actual record ID, and instead query the
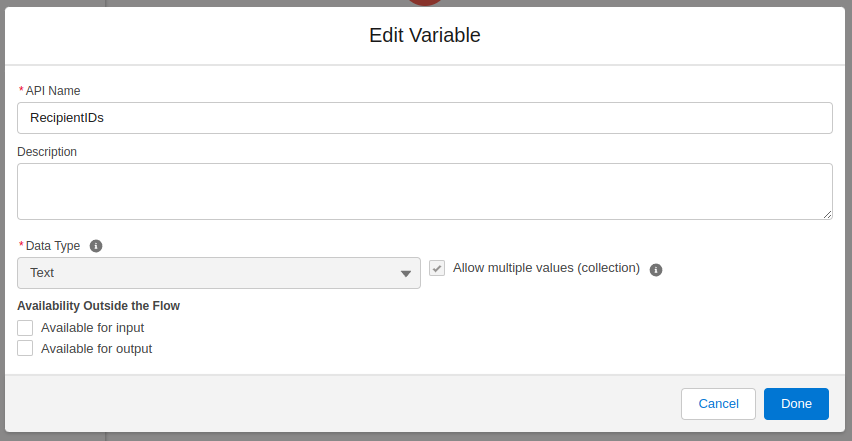
Custom Notification Typeobject for theAPI Namenoted in step 1 (using theDeveloperNamefield in the Flow). In the example below it isContact_Notification. - The recipient IDs in later steps requires a text collection. It does not accepts a record collection (“sObject” collection). Add a new resource called
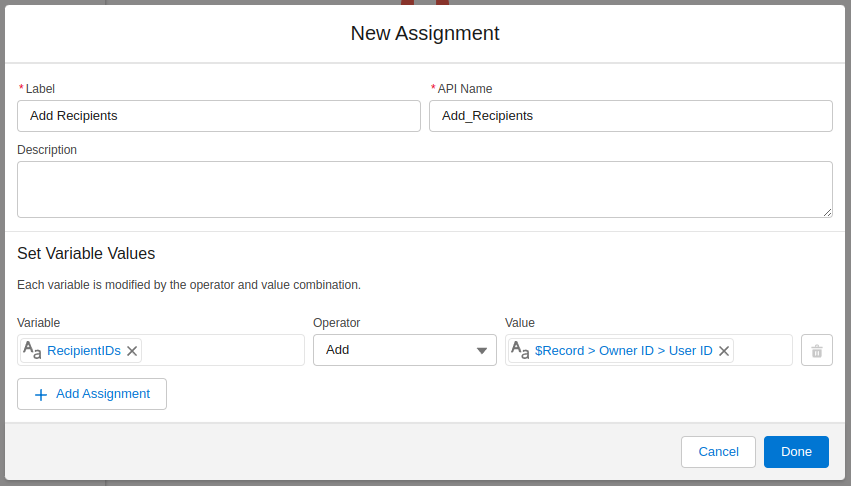
RecipientIDswith data type Text to the Flow. In the example below, I include a single User ID, the owner of the new Contact. Up to 500 record IDs can be included, and IDs for queues as well as users can be added. - Add an assignment called “Add Recipients” or similar to the flow to populate the
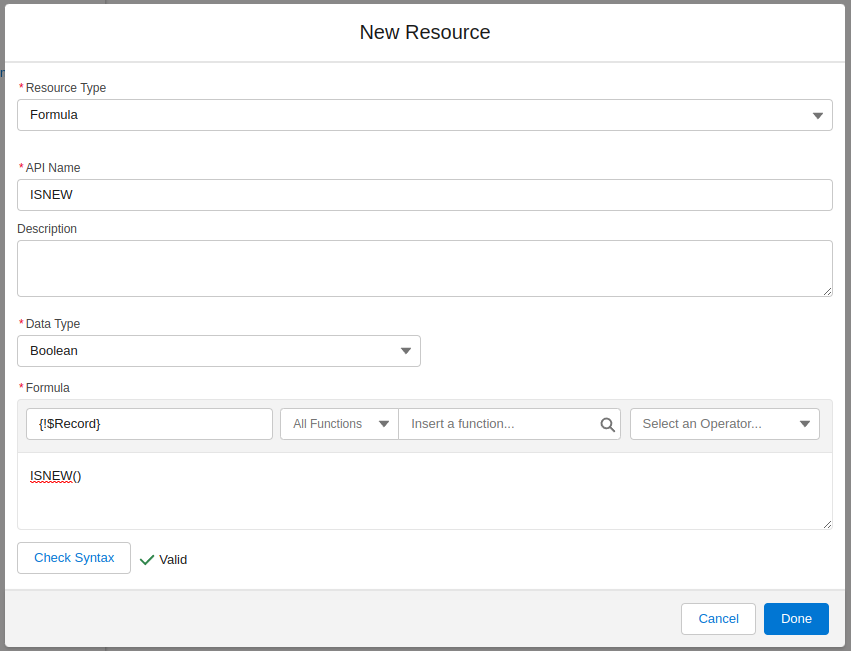
RecipientIDscollection. The example below adds the owner of the newContact. - If logic based on whether the record
ISNEWorISCHANGEDis needed, a formula resource can be added to the flow based on theISNEW()function that each flow has. - Set up a Decision to change the notification text, as required.
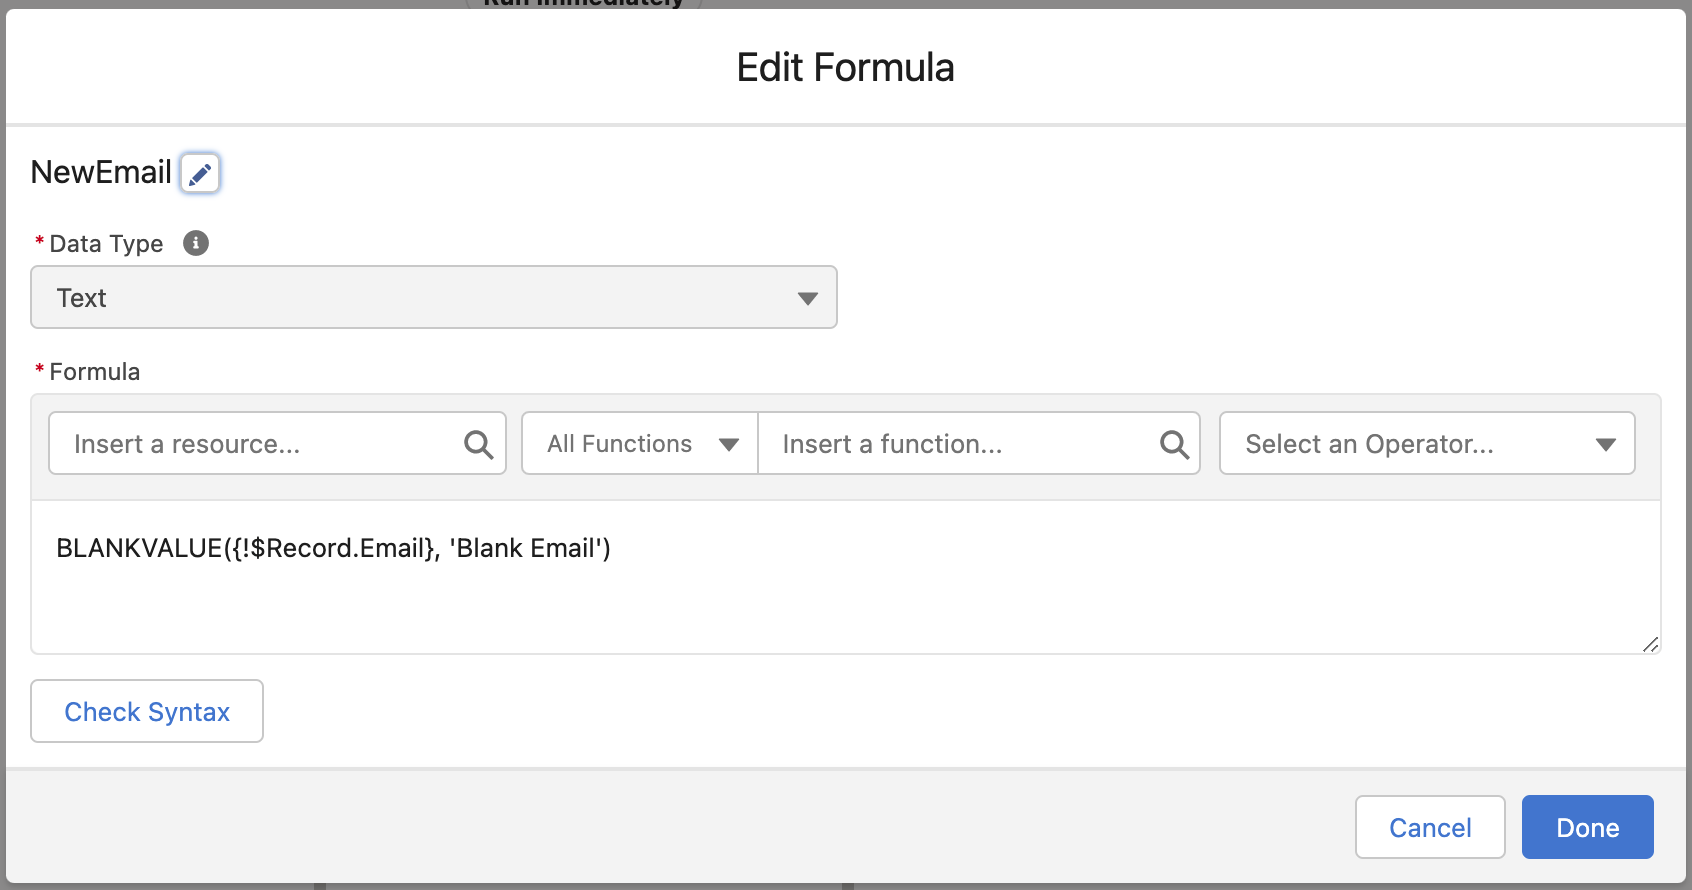
- Depending on the nature of the notification, setting up one or more formula resources like those shown below can be helpful to gracefully handle blank values. Example logic:
BLANKVALUE({!$Record__Prior.Email}, 'No Email'). - Set up the actual custom notifications using the
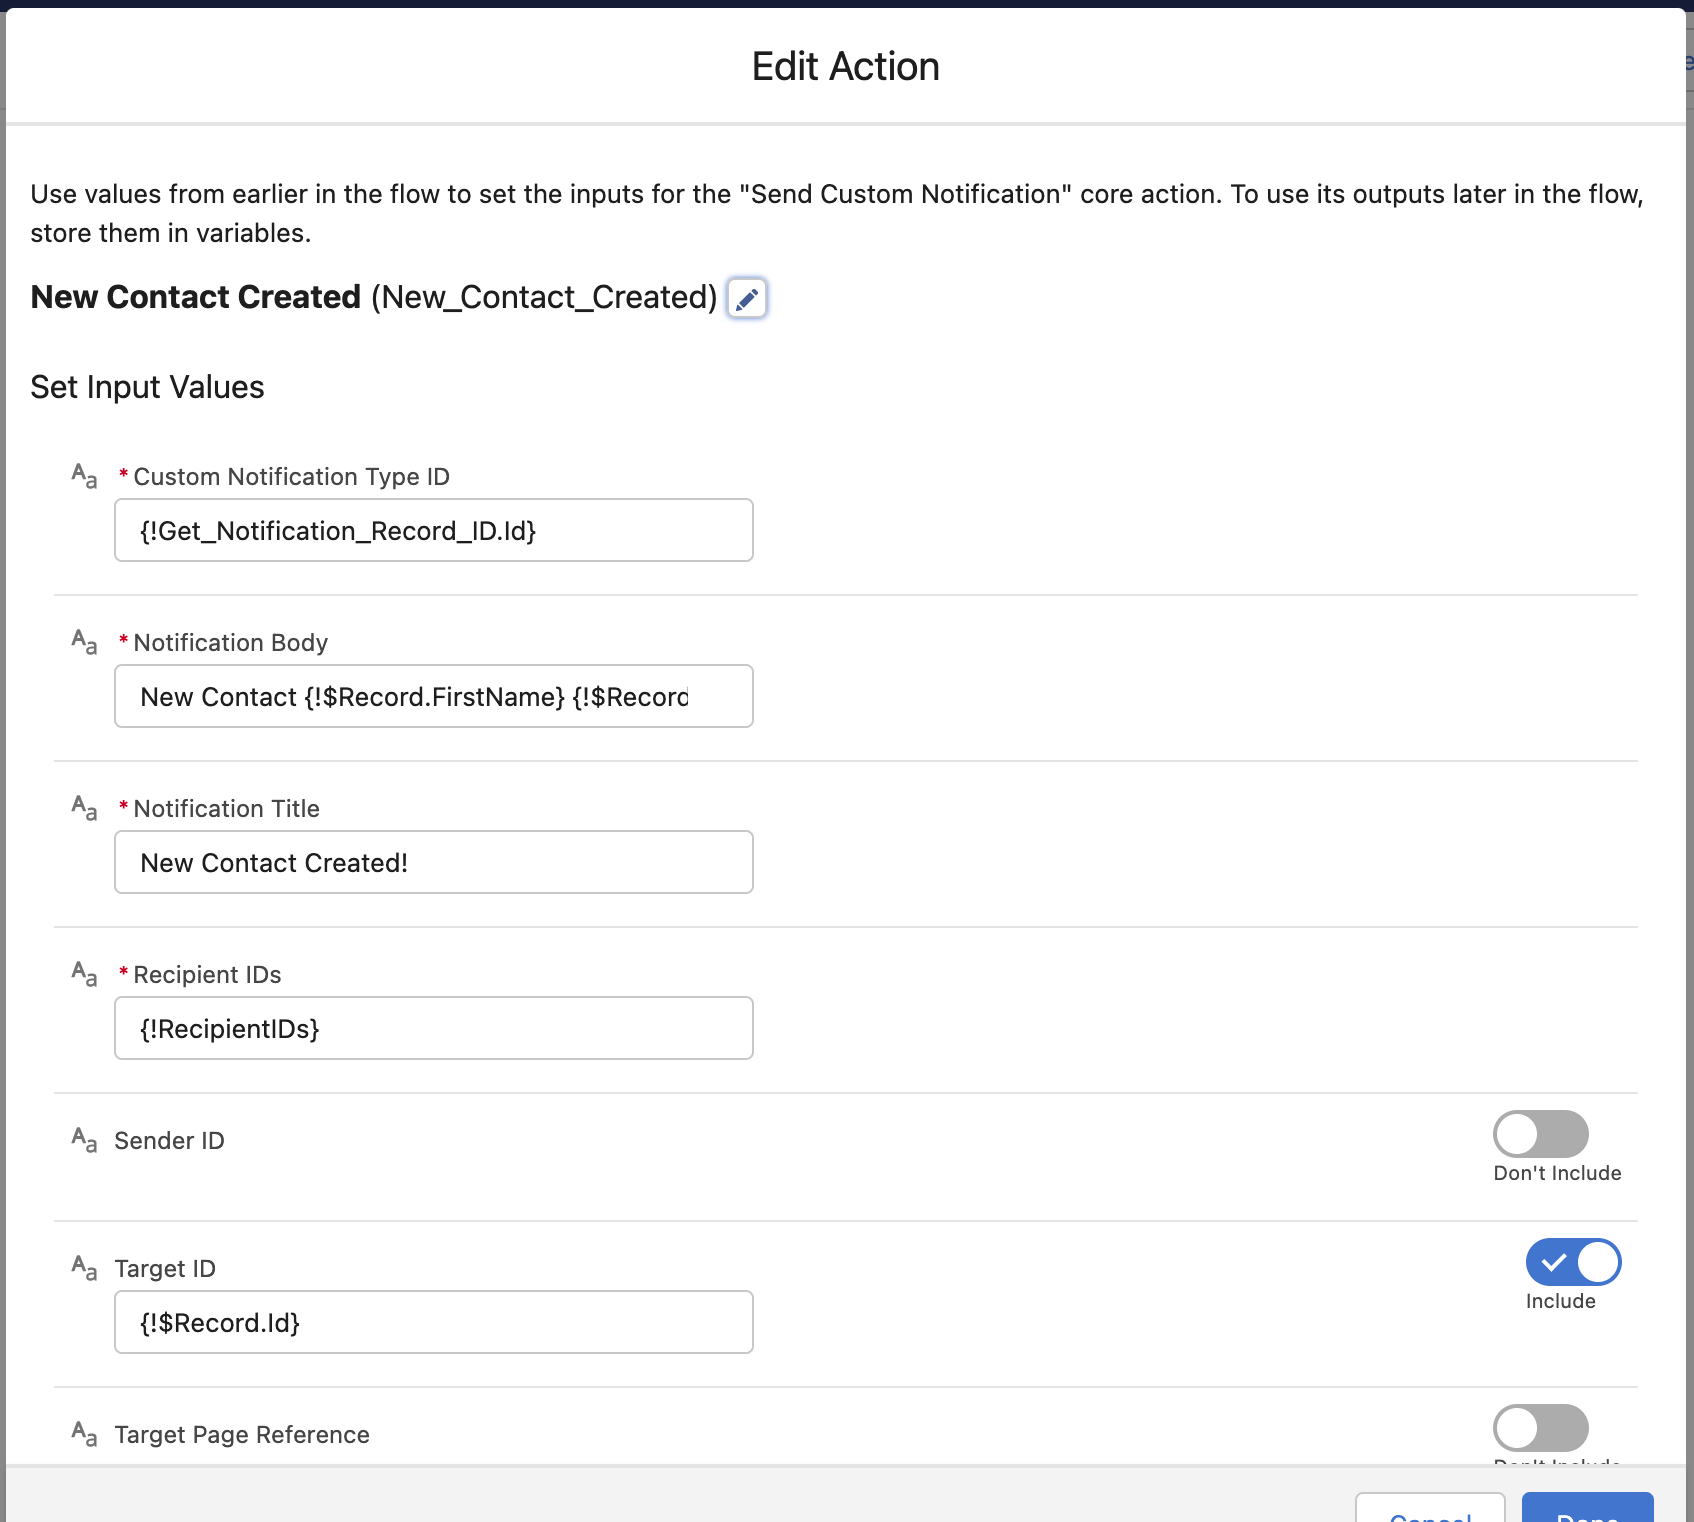
Custom Notification Type IDsandRecipientIDsfrom previous steps.
Worked Example
Step 1:
Step 3:

Step 4:
Step 5:
Step 6:
Step 7:
Step 8:s
Step 9:
Step 10:
Outcome: